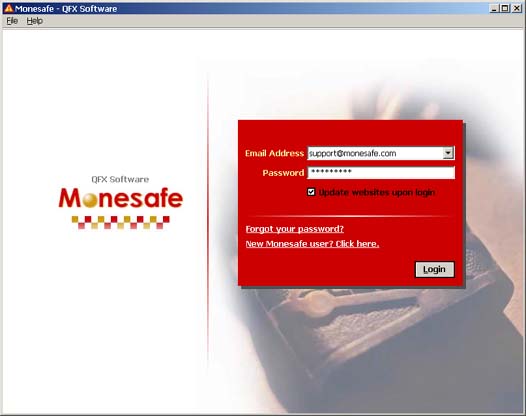
1.
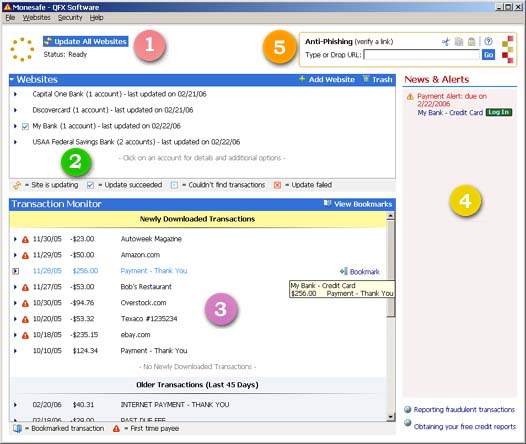
Update All Websites
After you've added all the accounts you want to monitor in
Monesafe, the rest is simple. Click on
Update All Websites,
and all of the transactions since your last update will display
in the
Transaction
Monitor for you to look at. You can also choose
auto
update by checking the box on the login page.
Top 
2.
Websites
You manage your websites and accounts here.
The Collapsible Title Bar
To display or hide websites, click on the title bar. 
Above: collapsed.
Below: expanded. The websites you've added are displayed
alphabetically, along with the number of accounts in each of
them and the time of its most recent update.
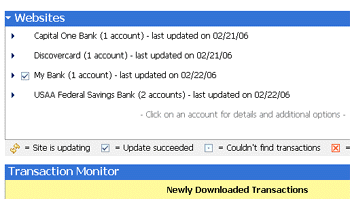
The listed websites: Each is a
clickable link.
Click on it, and you get a list of your accounts with the
institution, its website address (URL), and the following
functions:

- Update: To have the
most recent transactions downloaded and displayed for your
viewing. Monesafe does it automatically with the
existing accounts.
- Auto Login: To
automatically access the website via the secure Monesafe
path.
- Edit Site/Login Info: To
make changes to your bank's URL, password, or account
info. Follow the steps as you would add a new account.
(see also FAQ)
- Move Site to Trash:
To take an institution off the list. To permanently delete
the institution, click on Trash, highlight the
institution and click on Expunge.
The listed accounts: Each
is also a clickable link. Click on an account for
details and history of the account, such as past
transactions and balances. Click on Auto Log In to
automatically access the account.
Top
Adding a website
To use Monesafe, the first thing is to add website(s) that hold
the account(s) you wish to monitor. (Obtaining a user name and
password for online banking from your financial institution is a
prerequisite for taking the following
steps.)
- Click on Add Website to bring up the screen below.
Enter the name of the website or click on the alphabet to
get the website address (URL). If the URL of your
website is not available, click Search for URL to do
a Google search.
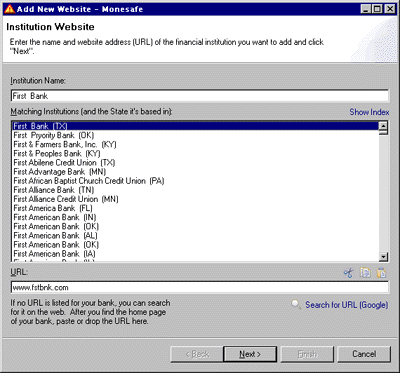
- Click Next, and you're at your bank's website via
Monesafe's secure connection.
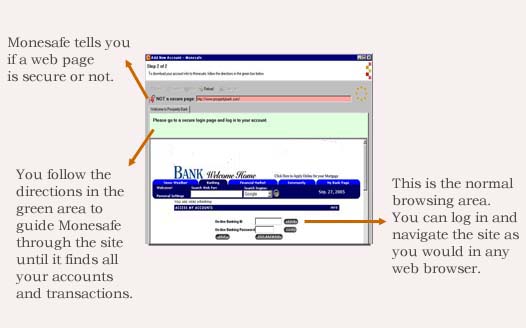
- Log in to your account(s) on the website. (All your
personal and accounts information is encrypted and secure in
Monesafe and can be seen only by you on your computer.)
- Go to a Transactions or Activity page for each of
the accounts. After you've visited the transactions pages of
all your accounts, click to bring up the summary page.
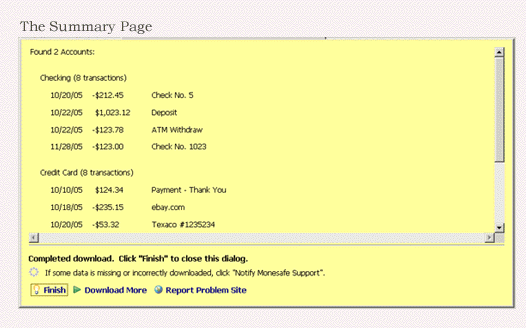
- *Click Finish. Your account(s) will be added to
Monesafe, and you'll be back to Monesafe's main screen to
view the new transactions in Transaction Monitor.
After a website is added to Monesafe, you can update your
account(s) by clicking on Update All
Websites or by choosing automatic
update.
You have to repeat the above steps only if you've changed
your user name or password or other login information for your
accounts.
*If you know Monesafe has not found all your accounts and
transactions on this site, you can click on Report Problem
Site to send that page to our tech support staff so we can
fix it. (Currently Monesafe does not monitor investment
accounts.)
Top
Deleting an existing website or
account
To delete a website you no longer want in Monesafe, first click
on the item and then on
Move Site to Trash.
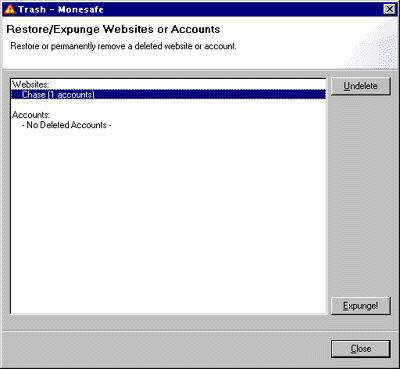
Trash
The websites and accounts you've deleted are stored in Trash.
To reinstate an account or a website, highlight the item and
click Undelete. To delete an item permanently, click on Expunge!.
Top
3. Transaction Monitor
Newly Downloaded Transactions: Look out for suspicious
activity here!
The transactions listed in this area are the ones you haven't
looked at before. First-time (i.e., unknown to the Monitor)
payees are highlighted with red little icons for your special
attention. The date, $ amount, and payee information of each
transaction are also displayed.
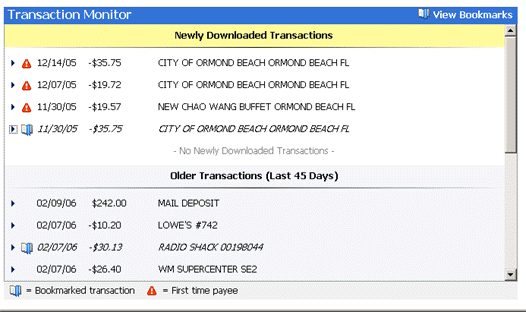 Older Transactions (Last 45 days)
The downloaded transactions stay in the Monitor for 45 days,
except for the bookmarked ones, which are displayed all the
time.
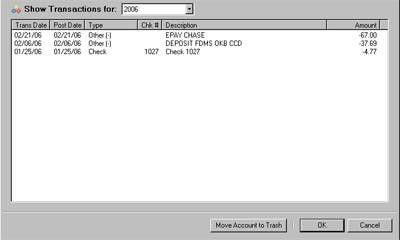
The listed transactions:
Each is a clickable link. Click on it, and you get
details about the transaction, including the type of
transaction, the institution that holds the account and account
balance.
- Bookmark: Click
on it to highlight an important transaction. The bookmarked
transactions will be displayed in the Monitor even when they
are older than 45 days.
- Contact Institution:
Click on it to report a fraudulent transaction. Early
detection and quick action save money, time and lots of
headache.
View Bookmarks: To display in
one place all the transactions you've bookmarked.
- Transactions older than 45
days: They are stored as part of the history of your
accounts. To look up an old transaction, go to Websites
and click on the account in which the transaction was made.
A list of past transactions in the account will
appear.
Top
4. News & Alerts
Low balances, bills due, approaching credit limit and new
upgrades are displayed here.
- Details:
Appears after low balances and credit limits. Click on it to
look up all past transactions in an account.
- Log In: Appears after bills
due. Click on it to pay bills online through the secure
Monesafe path.
- Links: Outside links for
reporting fraud and/or requesting a free annual credit
report from the three credit bureaus.
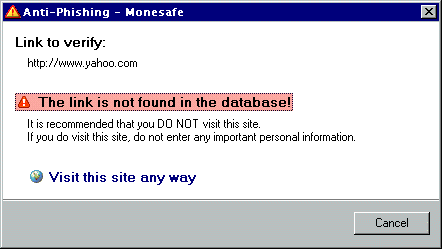
5.
Anti-Phishing
Monesafe checks URLs against the FDIC/NCUA database of
approximately 16,000 financial institutions in the U.S. and
gives warning if a link you enter is not found in the data base.
This is especially important in fighting
phishingers,
who usually sends out emails with fake links to steal personal
information from customers.
A link that is not a financial institution is also
invalidated, as shown in the screenshot below. A valid URL will
lead you directly to the financial website.
Top