Monechron
Tutorials
Lesson
3: Using Web Scout™ to import transactions from
your banks' websites
Click on the Accounts
icon and then on Web Scout™, and the screen
should look like this 
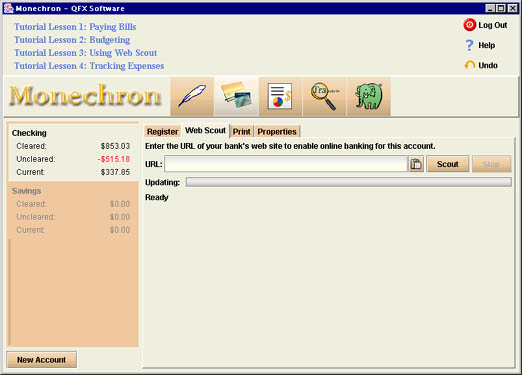
At this point, if
you've done tutorial Lesson 1
and have written a check on Monechron, you
will see that your bank account is displayed on the left, with the
current balance. If it's an online account, simply click on Scout to
update your account balance. If it's an offline account, go on to
the next section.
Suppose this is the
first time you use Web Scout™, you'll need to
log on to your bank's website to begin scouting. (If you do not have
a User ID and password, you must first log on to your bank's website
from your browser and obtain one, then you can proceed with Web
Scout™.)
Step1: Enter
your bank's website address after URL, for example, www.anybank.com,
and click on Scout. A dialog box will pop up for you to log on to
your bank's website
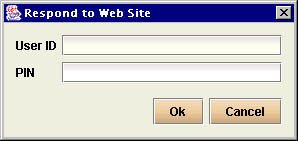
Step 2:
Enter your User ID and PIN for your bank's website and click on OK.
You need to do this only once, as a new user of Web Scout™.
(For
your peace of mind, please note: Your User ID and password are
stored only on your computer and are protected by strong encryption.
You are the only one who has access to it.)
It will take a few
seconds for Web Scout™ to access your bank's
website. While you wait, here's an overview of how online banking
works in Monechron. Normally, you balance
your checkbook and reconcile your accounts by hand, which would
involve matching your bank statements against your checkbook
register every month and manually correcting any discrepancies in
the process.
With Web
Scout™ as your "agent", you will never have
to spend time doing everything manually again. The Monechron
register is your personal "checkbook," keeping a
record of all the checks you've written and transactions you've made
in Monechron. And Web Scout™,
every time you click on Scout, will bring an instant, up-to-date
"bank statement" back to you, with a list of the
transactions that have cleared the bank. Web Scout™ will
also compare notes with your "checkbook", reconciling it
with the "bank statement" to give you your realtime
balance. All you have to do is verify the information brought to you
by your "agent" and save it to your register.
When Web Scout™
finishes updating, another dialog box will pop up
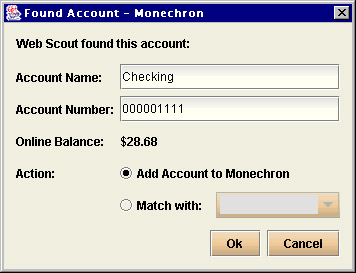
Step 3: Your
accounts with the bank will appear in the dialog box. From the
dropdown list select the appropriate action: Add it if it's a new
account; Match with: if the account is already listed in Monechron,
and click on OK. Each account will be saved.
Step 4: Next,
click on any of the accounts you've just saved, and the reconcile
screen will show
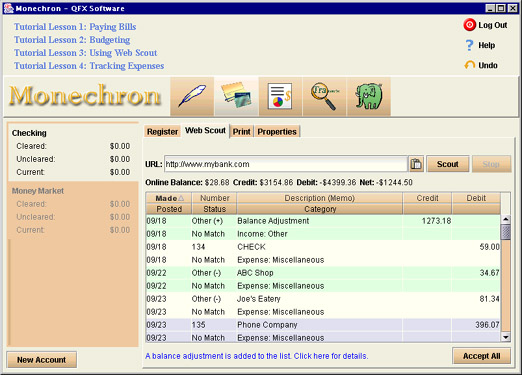
A list of the
transactions that have recently cleared your bank should be
displayed here. Each transaction should be marked as Matched,
Mismatched, or No Match. A Matched transaction means
that the bank's record matches exactly the same one in your Monechron
register. A Mismatched transaction means that a discrepancy
in amount exists between the bank's record and your record. A No
Match transaction means that the bank has recorded the cleared
transaction but it is not found in your register.
Step 5: In case
of a Mismatch, check for errors. Click on the mismatched transaction
and a dialog box will pop up for you to make corrections to the
transaction in your register.
Step 6: Once
you've fixed the mismatches, simply click on Accept All. Your
account is now automatically reconciled.
Your credit card
transactions brought to you by Web Scout™ are
categorized by default as Miscellaneous. In order for a credit card
payment to be recorded correctly as expense, select from the
dropdown list Transfer so the credit won't be treated as your
income. Also, when you write a check to pay your credit card bill,
you should categorize it as Transfer.
For other transactions,
click on the dropdown list after each transaction to categorize it.
Then click on Accept All. Once you've categorized a payee, for
example, categorizing Bob's Fried Chicken as Dining, all subsequent
charges at Bob's will be automatically labeled as Dining.
To make
tracking/budgeting more accurate, you should categorize all
uncategorized transactions.
After you've added the
accounts you wish to operate in Monechron,
all you need to do later is select any of the accounts you want to
update and click on Scout. Web Scout™ will bring
to you a new list of transactions that have cleared your bank, with
each marked as Matched, Mismatched, or No Match. Click on Accept All
after you verify the information, and your "checkbook" is
balanced. It is just as easy as that!
If you wish to convert
an offline account to an online account, enter the URL of the bank's
website and click on Scout. The rest is the same as described in Section
3.1.
For questions, email support@qfxsoftware.com,
or go to the User Manual for a more
detailed description of Web
Scout™ features.
 Previous Top
 Next
Next  |
