Monechron
Tutorials
In four
separate lessons, we will walk you through the major functions of
QFX Monechron with step by step instruction.
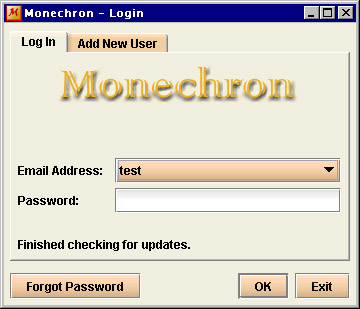
Let's assume you've registered and downloaded the program, and this
is the screen you should see 
|
|
As a new user,
you need to enter the same email address and password you used
to register. Click on OK. (If you haven't yet registered,
click on New Account.)
The
first time you log on, you need to be connected to the
Internet.
If
you forget your password, click on Forgot Password to retrieve
it. |
The next screen should
look like this
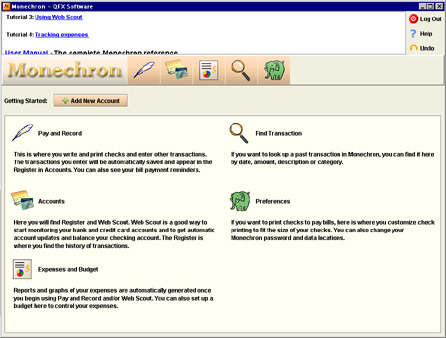
The Welcome page
provides a brief overview of the functions of the five icons so you
know where to go. But first let's click on Add New Account so we
have an active account to work with.
The Add New Account
screen should look like this
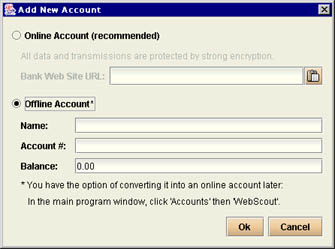
Enter information for
one of your active bank accounts (either an online or an offline
one). If you have an online account, enter your bank's web address
(for example, www.anybank.com), click OK, and Monechron's
Web Scout™ will set to work. (If you've copied
your bank's web address, click on the paste icon and then click OK.)
We recommend that you
use an online account from the very beginning so you can get the
maximum benefit of Web Scout™. (More information
in Tutorial Lesson
3 and User Manual 3.
Accounts -Web Scout™)
If you wish to stay
offline, click on Offline Account, enter the information in the
lower part, and click on OK. Now you will have an account from which
you will write and print out your first check in our tutorial Lesson
One.
Once you're logged in,
you will come to the Pay & Record screen, which
should look like this
In the area on the left
you see payment reminders (with due dates preceding it), and a list
of payees in alphabetical order. In time you'll develop your own
payee list. You will also have reminders which, appearing ten days
before a payment is due, will help you not to forget upcoming
transactions.
On the right is a blank
check and you do what you usually do writing a check---fill in the
blanks. That'll bring us to Lesson
1: Writing and printing checks; recording other transactions.
Top
 Next
Next  |
